Patrol routes
Create a patrol route
Build a route from a building's checkpoints, put them in the order guards should walk them and set how the route is patrolled.
Updated October 5, 2026
On this page
A route is the list of checkpoints a guard visits on a patrol, in a fixed order. Every route belongs to one building and uses that building's checkpoints, so add the checkpoints first.
-
Click Create Route.
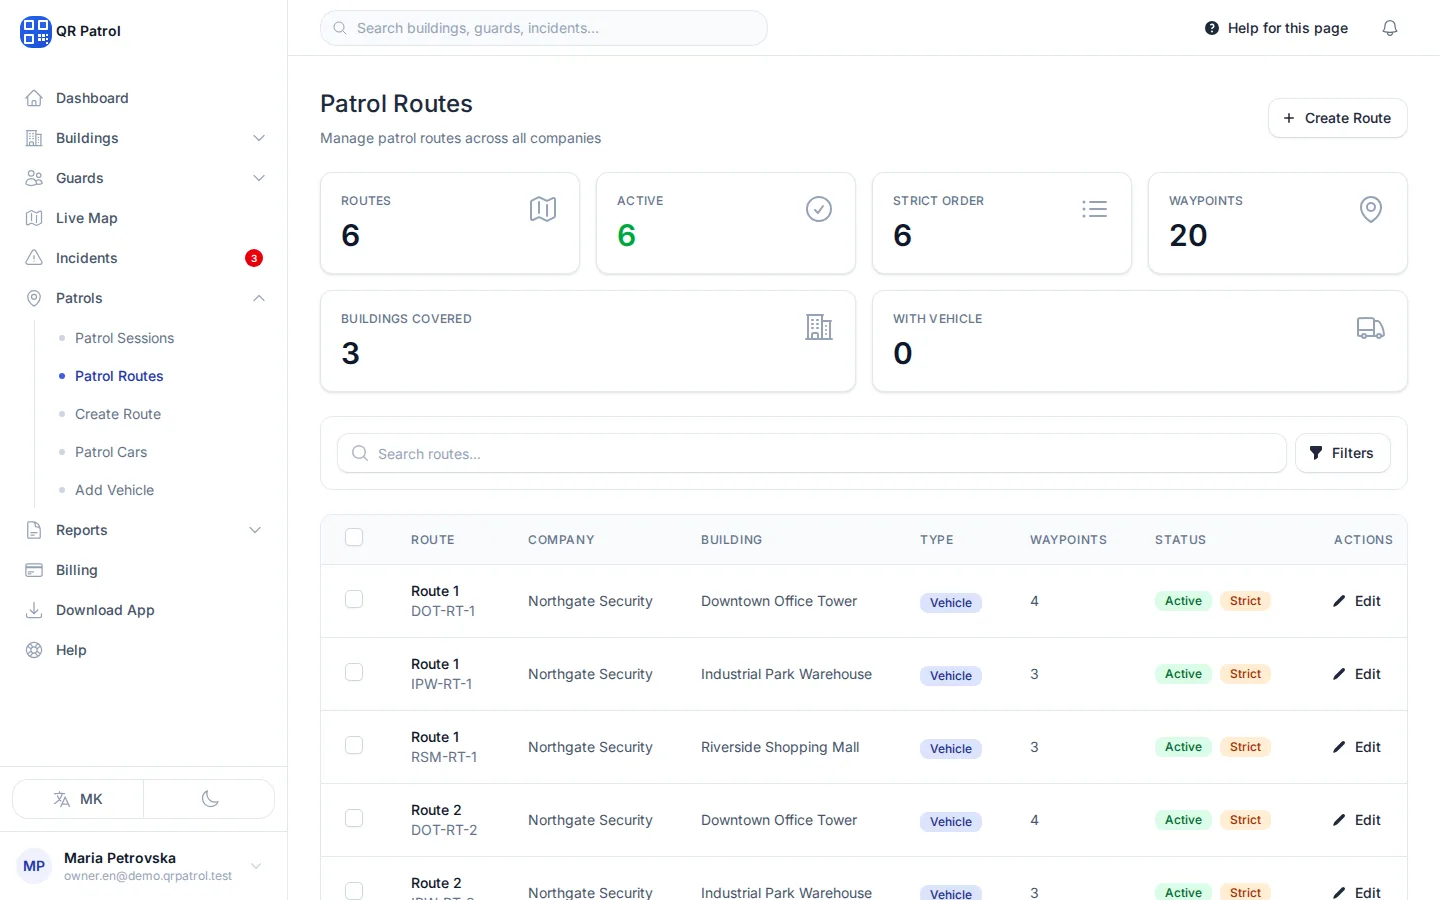
-
Choose the Building the route belongs to.
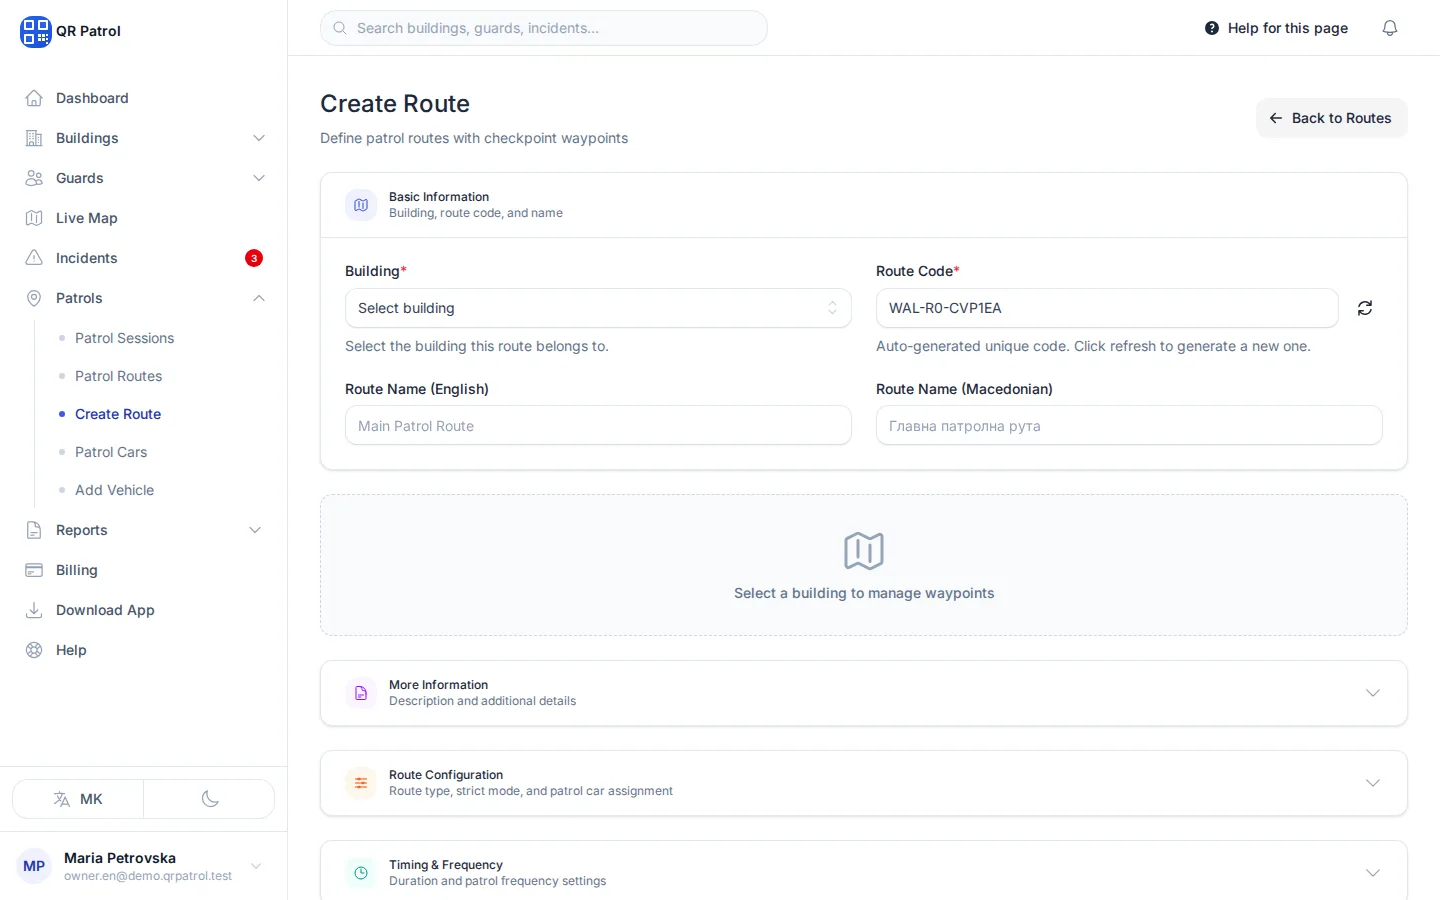
-
Give the route a name.
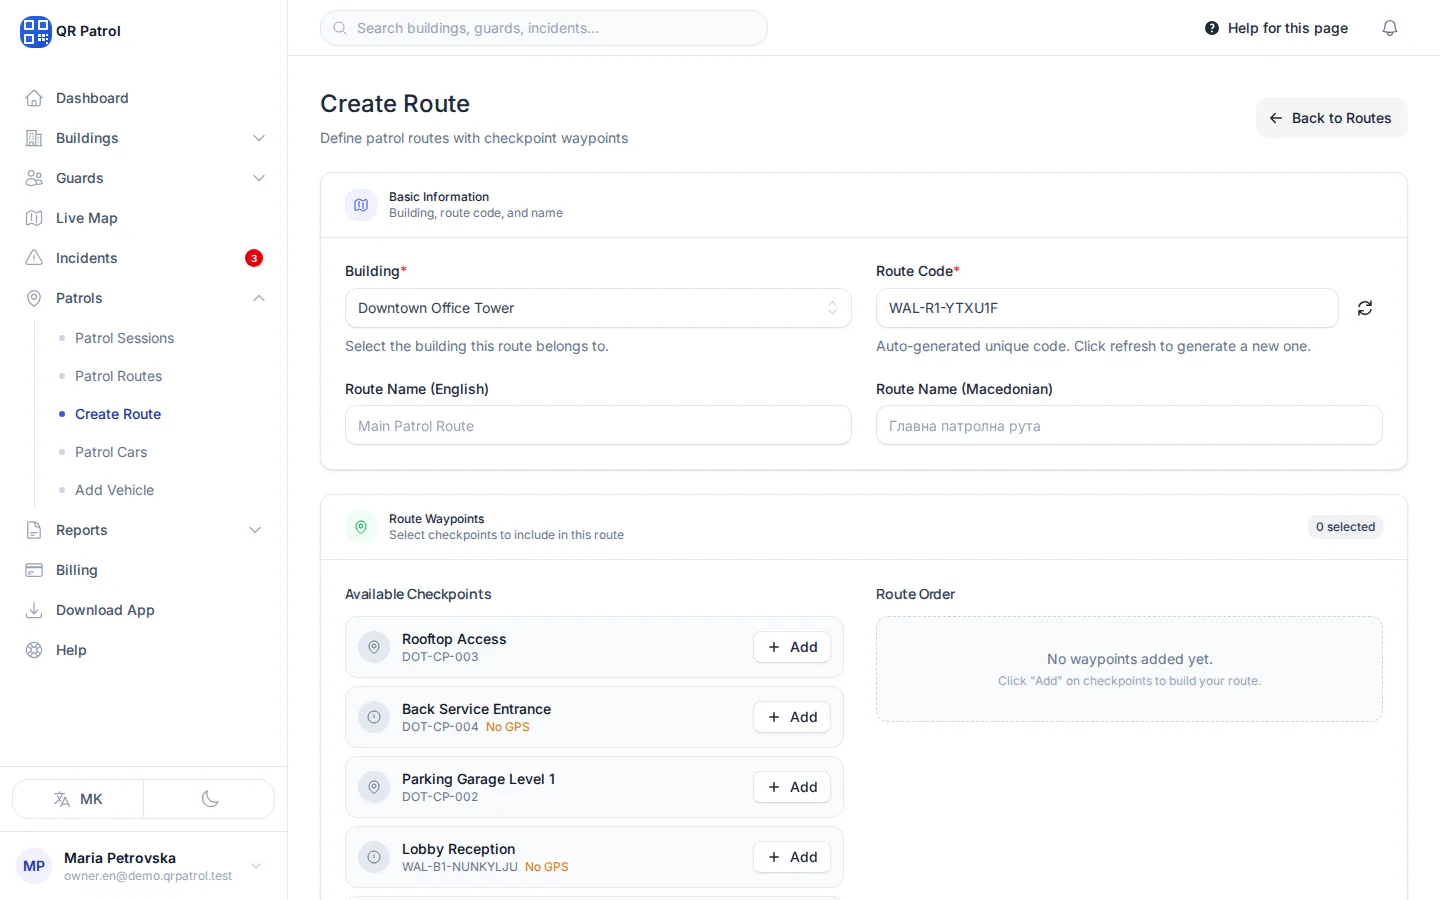
-
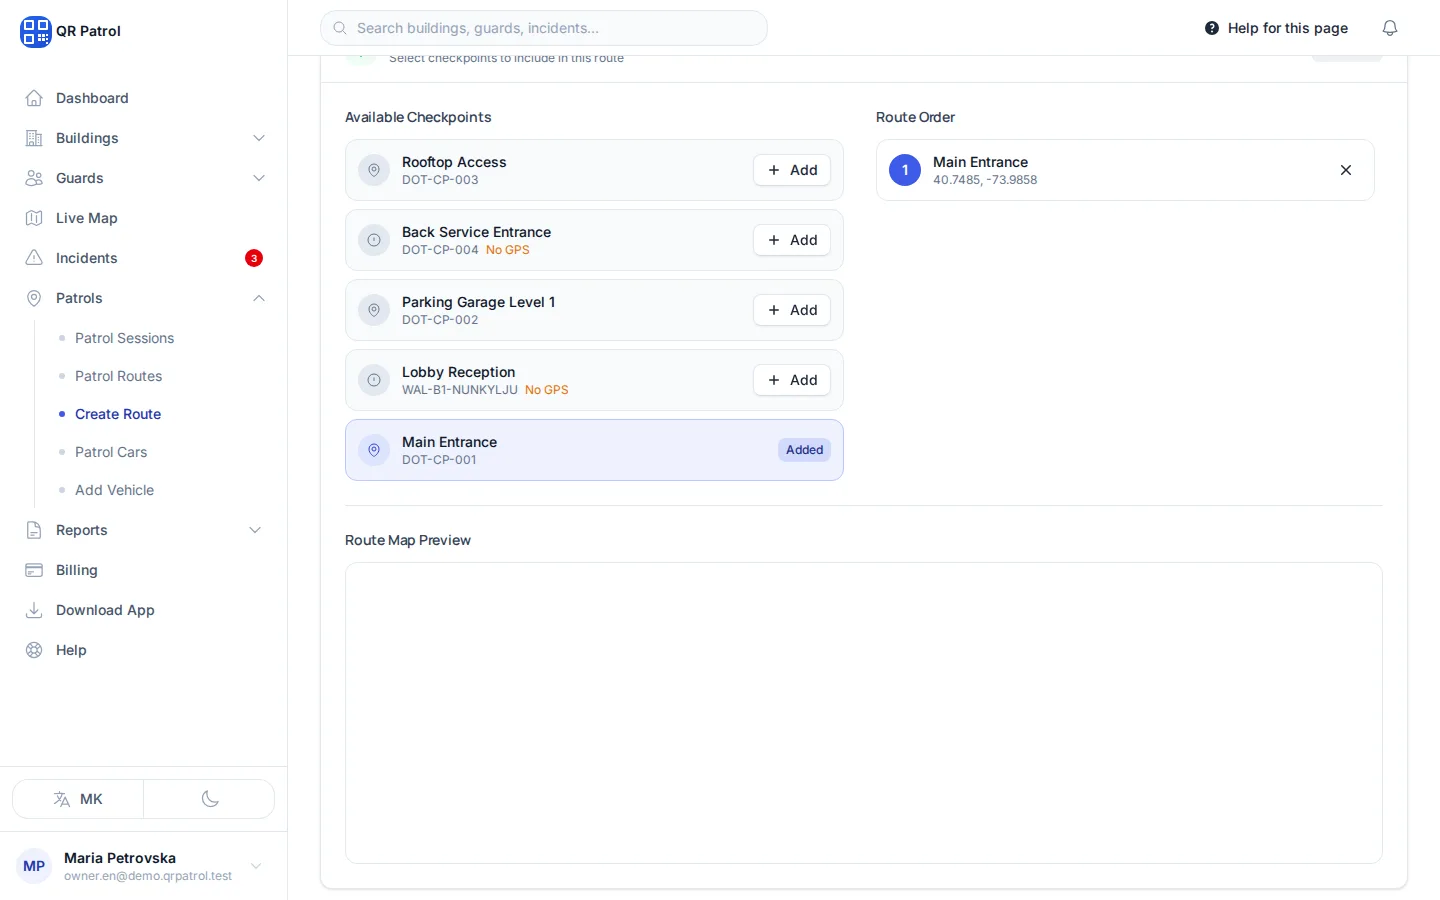
Click Add on the checkpoint guards visit first.
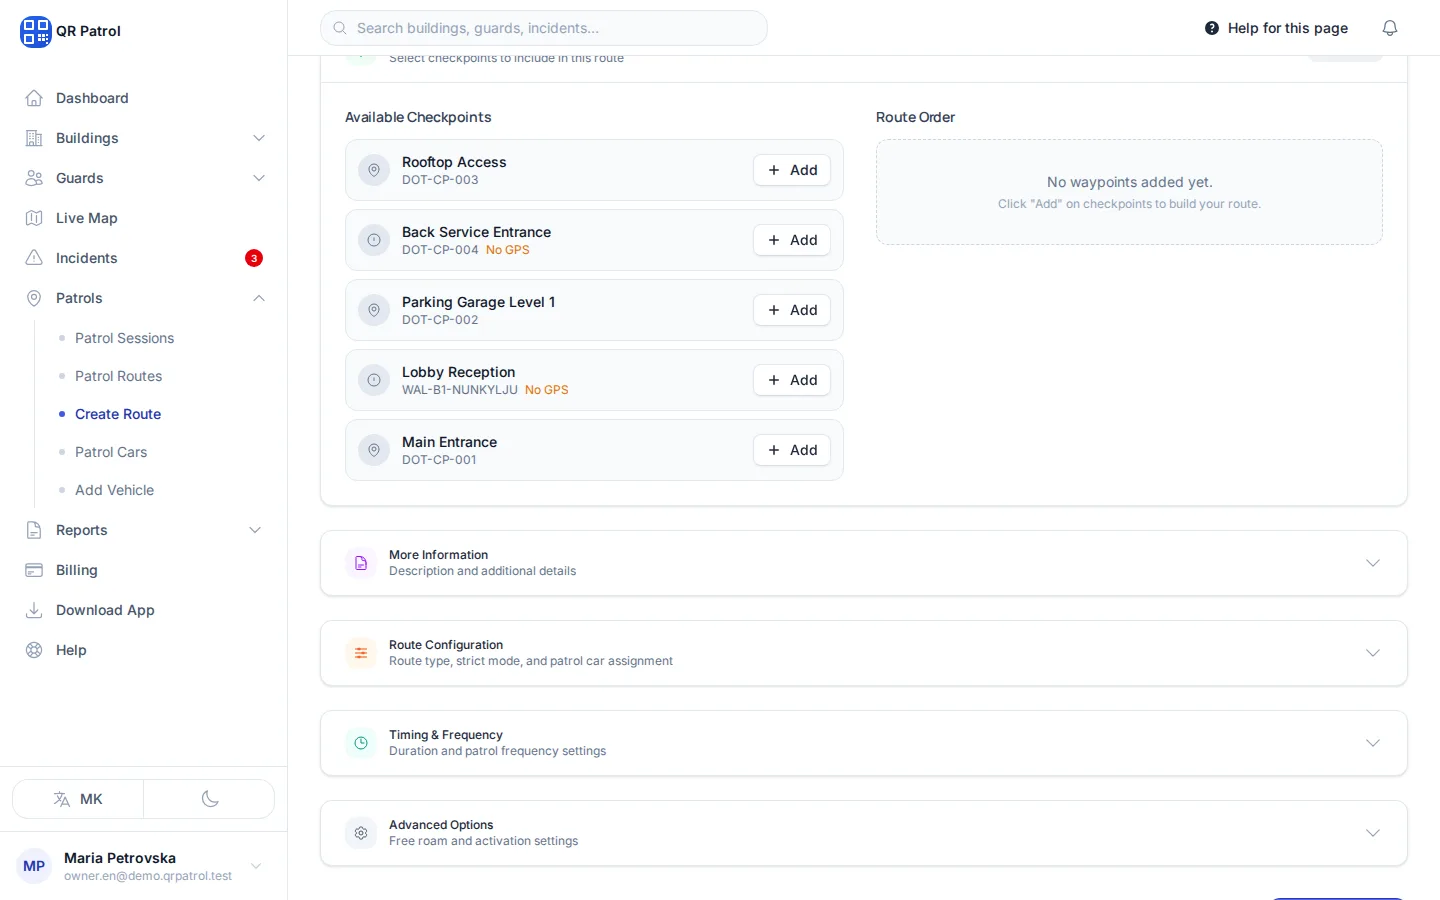
-
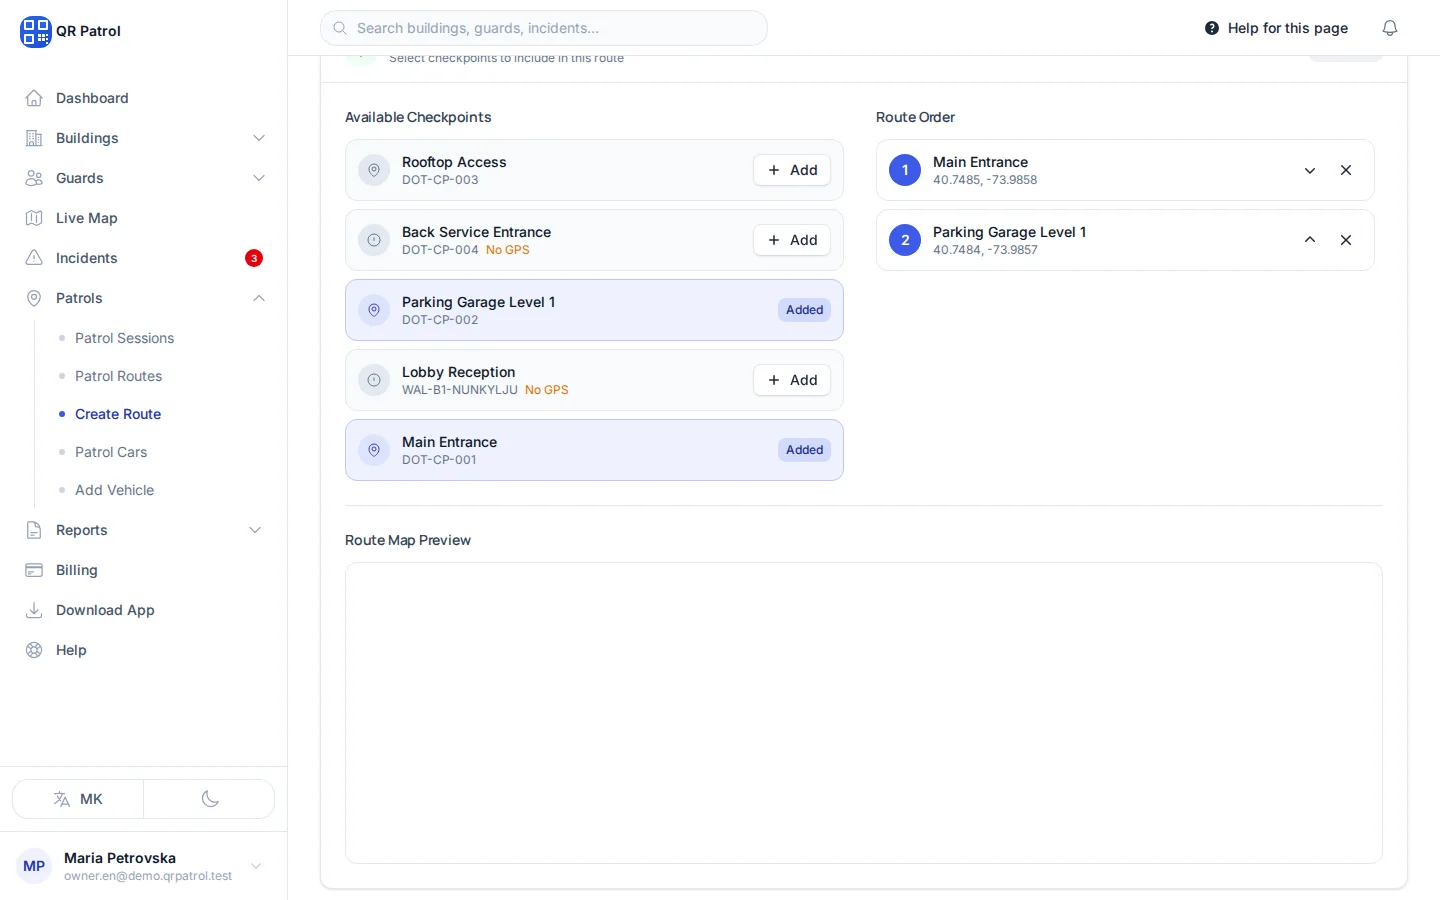
Add the next checkpoint.
-
Keep adding checkpoints in the order they should be walked.
-
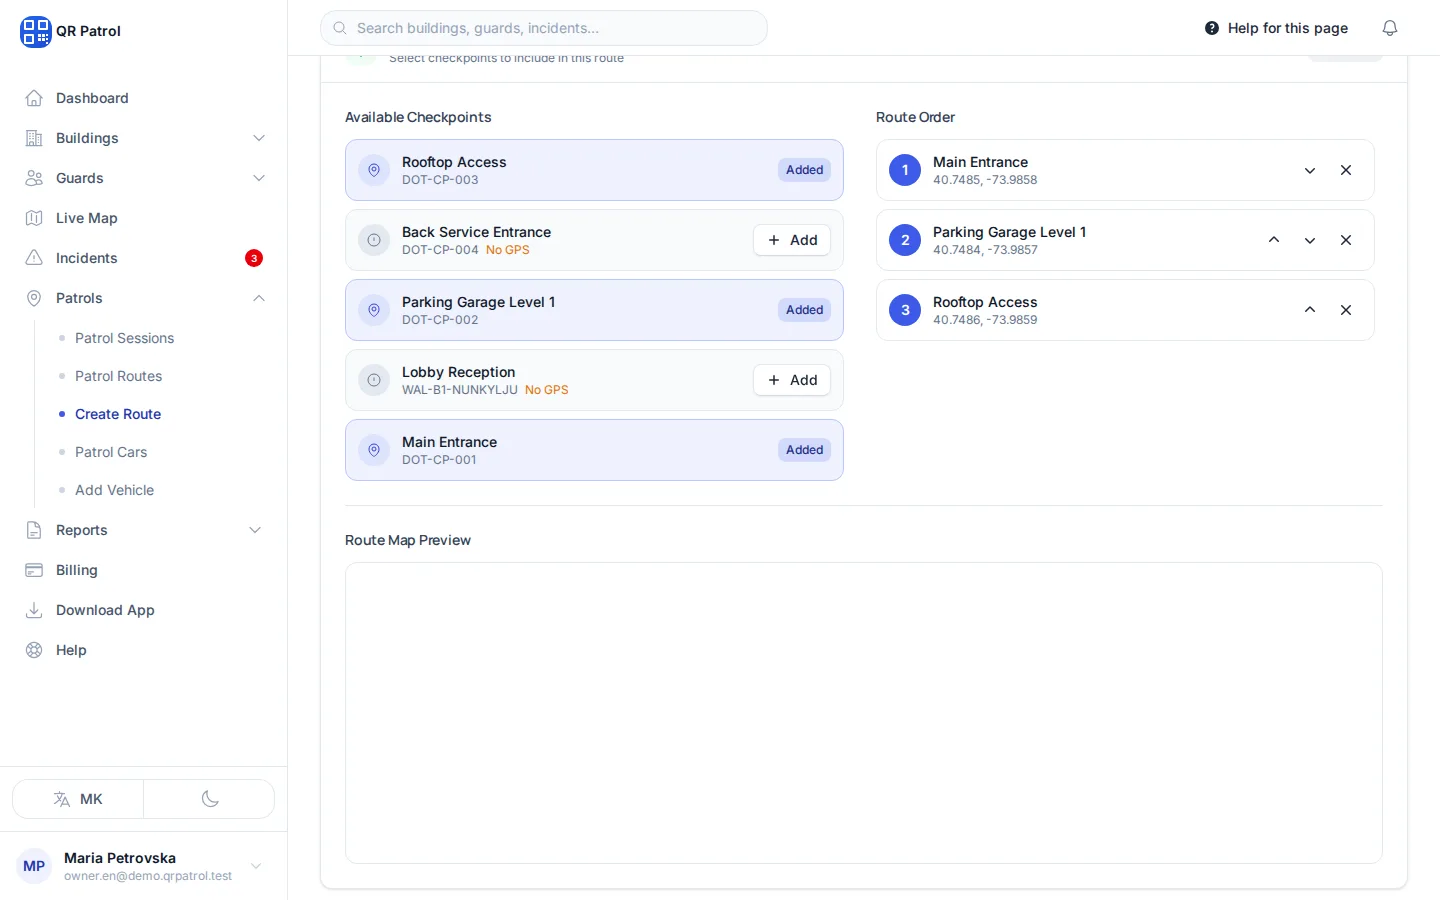
Route Order shows the sequence. Use the arrows to change it.
-
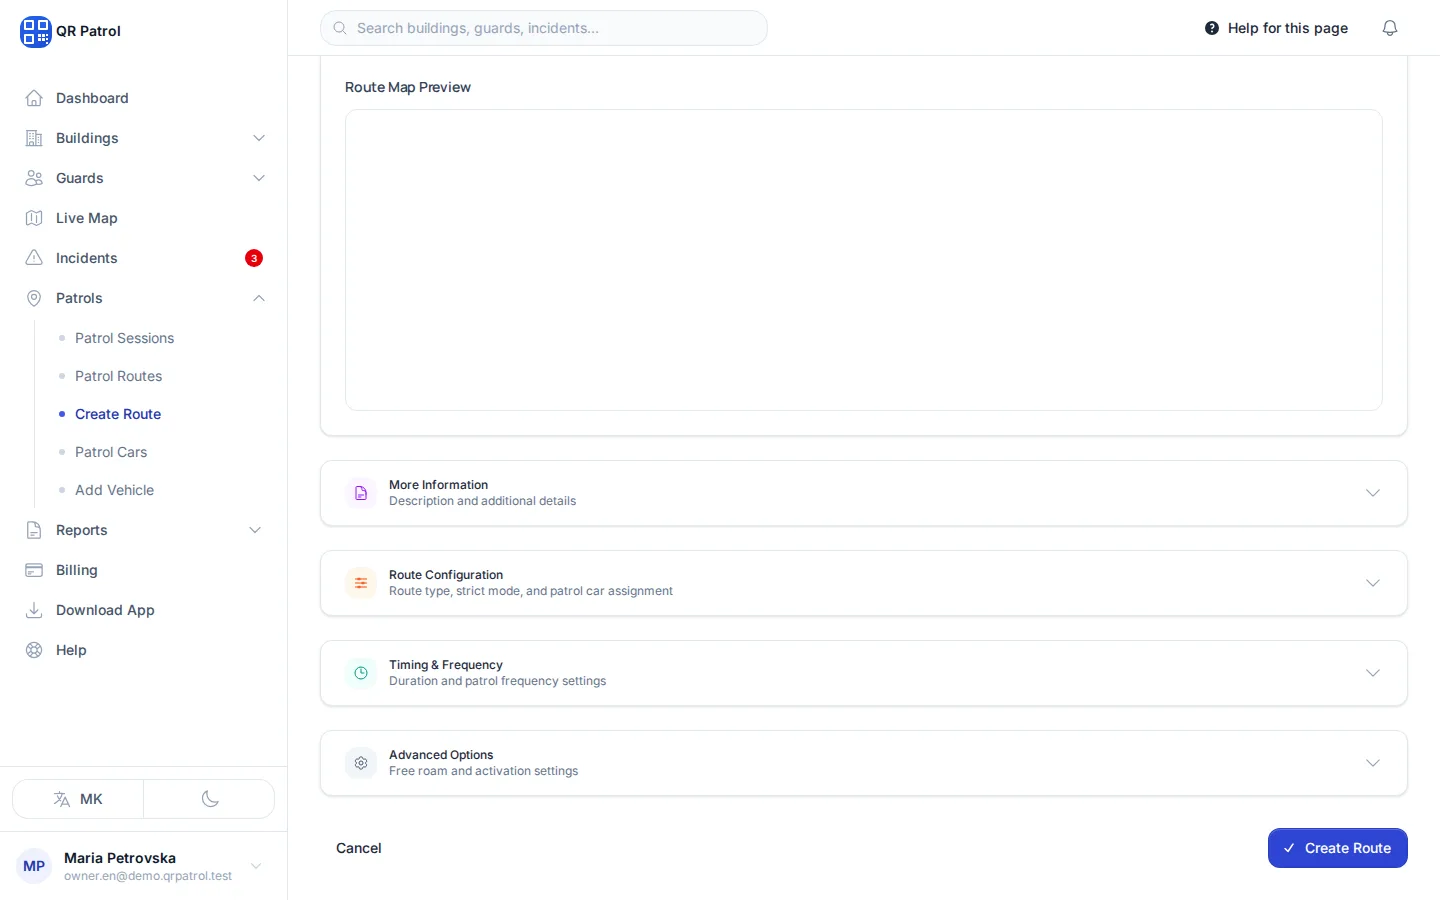
Click Create Route to save.
Create the route
- In the sidebar, open Patrols and click Patrol Routes.
- Click Create Route.
- Under Basic Information, choose the Building. Only active buildings are listed.
- Enter the Route Name (English). Route Name (Macedonian) is optional.
- Under Route Waypoints, click Add next to the checkpoint guards should visit first.
- Click Add on the remaining checkpoints, in the order guards should walk them.
- Click Create Route at the bottom of the form.
QRPatrol opens the building's page on the Patrol Routes tab, where the new route is listed.
The Route Code is filled in for you. You can keep it, type your own, or click the refresh button next to it for a new one.
Put the checkpoints in order
Available Checkpoints lists the building's active checkpoints. Route Order shows the ones you added, numbered in the order guards visit them.
- Click the up or down arrow on a checkpoint to move it.
- Click the cross to take it out of the route.
- A checkpoint marked No GPS has no coordinates. You can still add it, but it is left off the Route Map Preview.
A route needs at least one checkpoint before it can be saved. If you change the Building, the checkpoint list is cleared and you start again.
If the building has no checkpoints yet, you see No checkpoints available for this building. Click Create Checkpoint to add one. See Add checkpoints.
Optional settings
The sections below the checkpoints are closed by default. Click a section to open it.
| Section | What you can set |
|---|---|
| More Information | Description (English) and Description (Macedonian). |
| Route Configuration | Route Type: Walking, Vehicle or Mixed. For Vehicle and Mixed routes you can choose an Assigned Patrol Car. Tick Strict Order Mode when checkpoints must be visited in the exact sequence. |
| Timing & Frequency | Estimated Duration (minutes), up to 1440, and Required Frequency: Hourly, Every 2 Hours, Every 4 Hours, Every 8 Hours, Daily or Custom. With Custom, enter Custom Frequency (hours), from 0.5 to 168. |
| Advanced Options | Allows Free Roam for GPS-only tracking without strict waypoint validation, and Active. |
Untick Active to retire a route without deleting it. Inactive routes are not offered when you schedule a shift.
Edit a route
In Patrol Routes, click Edit on the route's row. Change what you need and click Update Route.
Change several routes at once
Tick the rows you want in the list. The bar that appears lets you Activate, Deactivate, Assign patrol car, Export CSV or Delete them. Deleting a route also removes its checkpoint order. Past patrols that used it are kept, but lose their route.
Find a route
Type in Search routes... to search the list. Click Filters to narrow it down by Building, Route Type, Required Frequency, Order Mode, Status and more.