Reports
Generate a report
Build a PDF, Excel or CSV report of scans, patrols, incidents and guard performance, then download it or email it to a client.
Updated October 5, 2026
On this page
The report wizard turns your patrol data into a file you can keep or send to a client. It takes four steps, and every report you generate is saved under Past Reports, where you can download it again or email it.
-
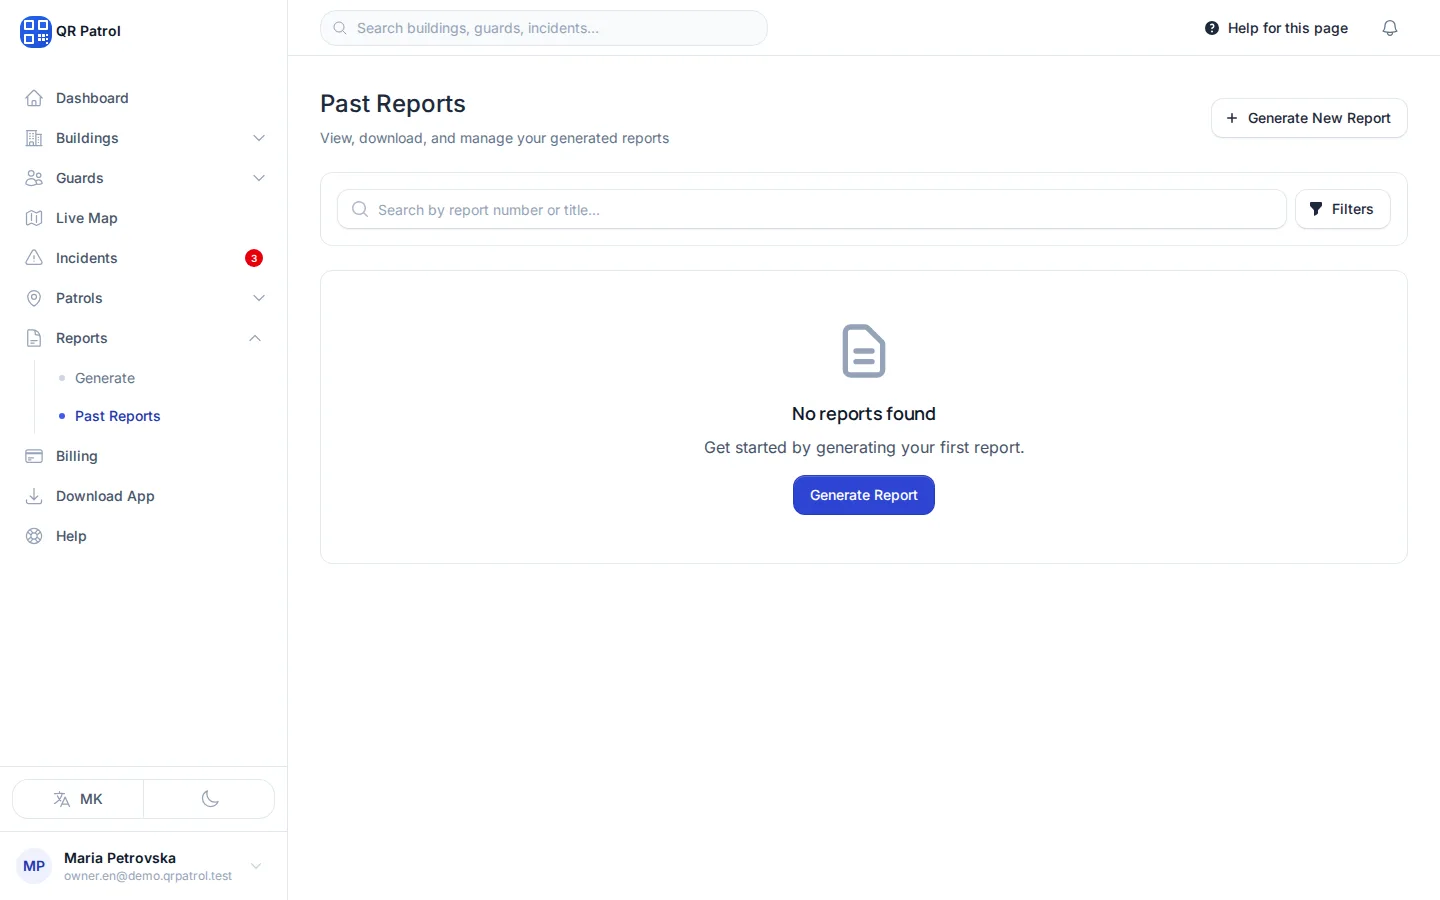
In Past Reports, click Generate New Report.
-
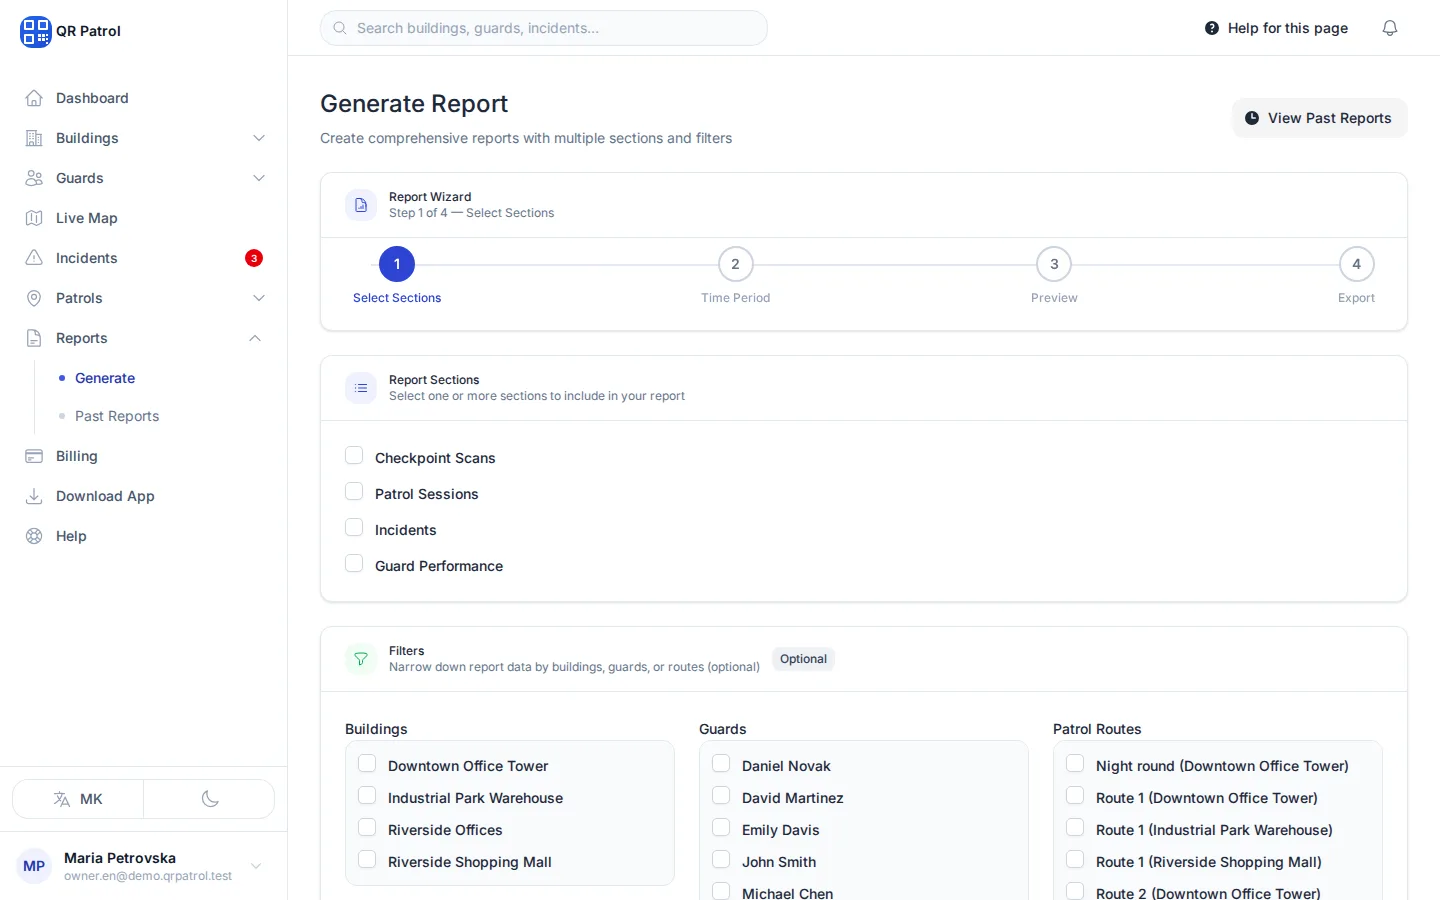
Tick the sections to include, for example Checkpoint Scans. The filters below are optional.
-
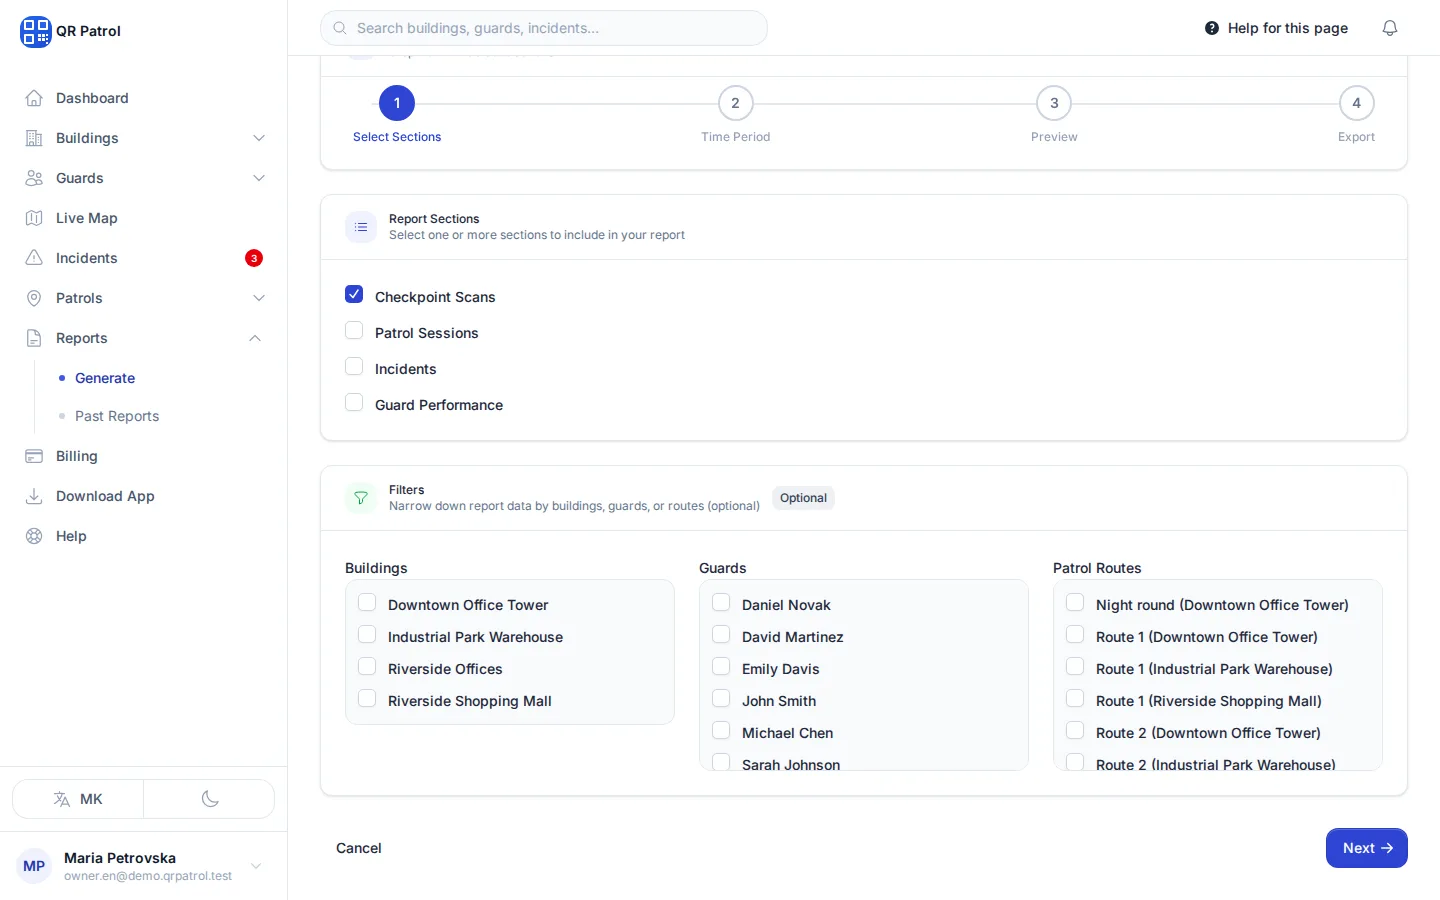
Click Next.
-
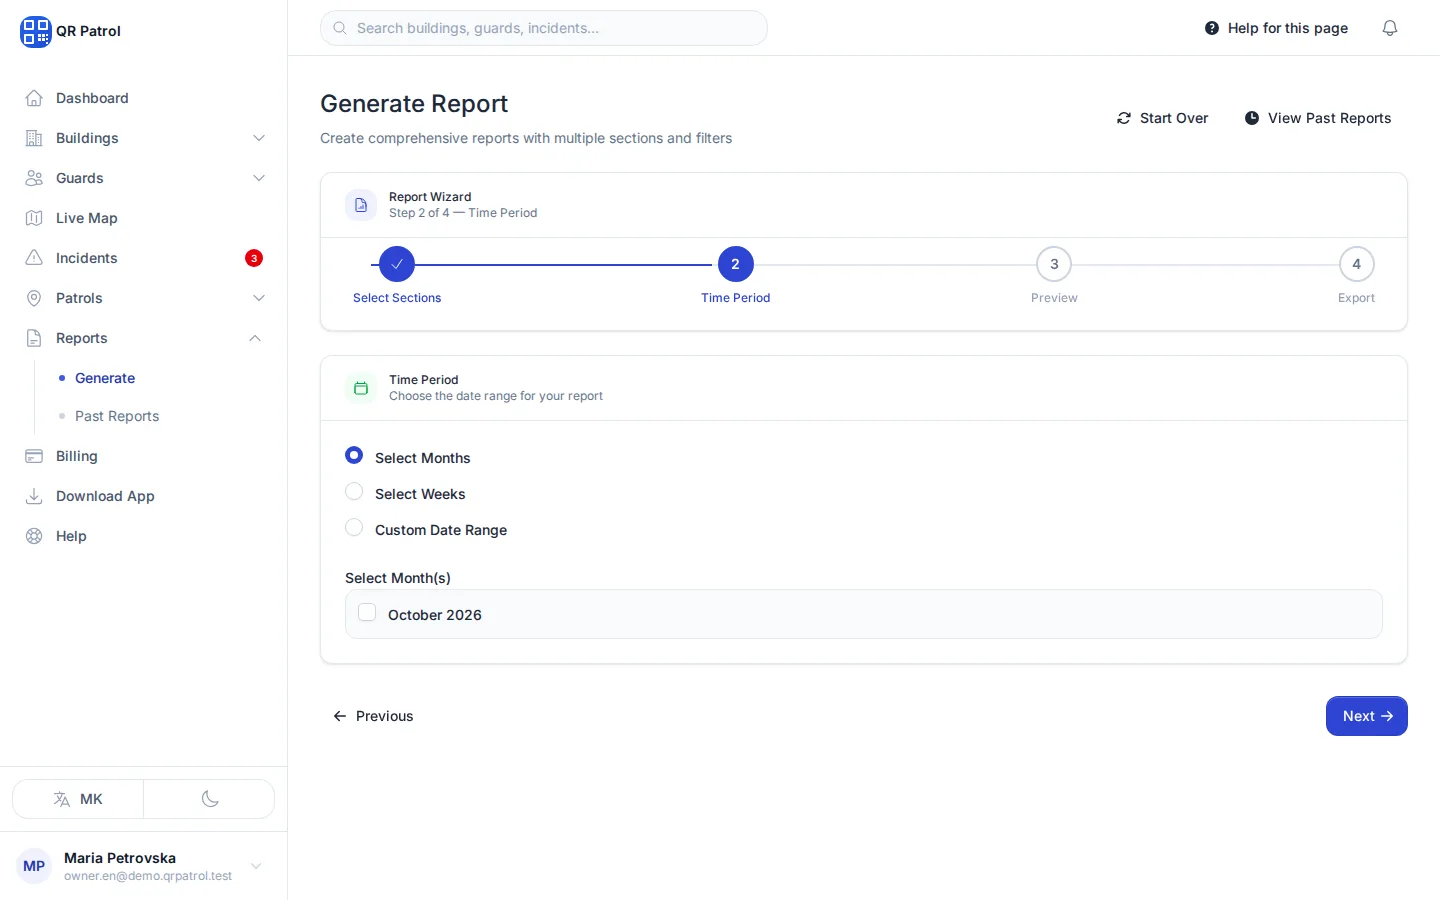
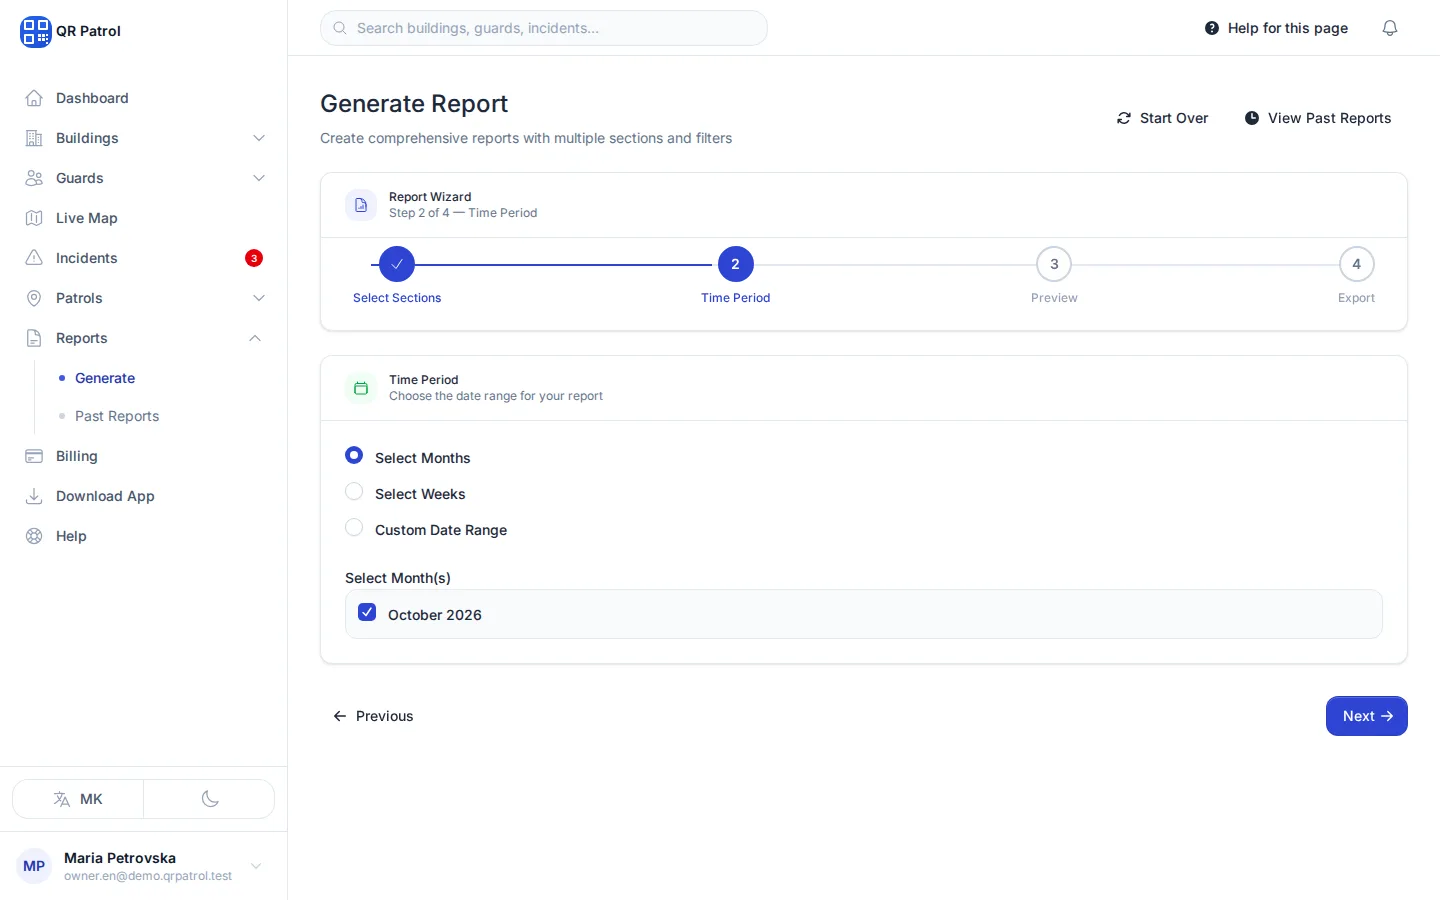
Tick the month the report should cover. You can tick several, or switch to weeks or a custom date range.
-
Click Next to build the preview.
-
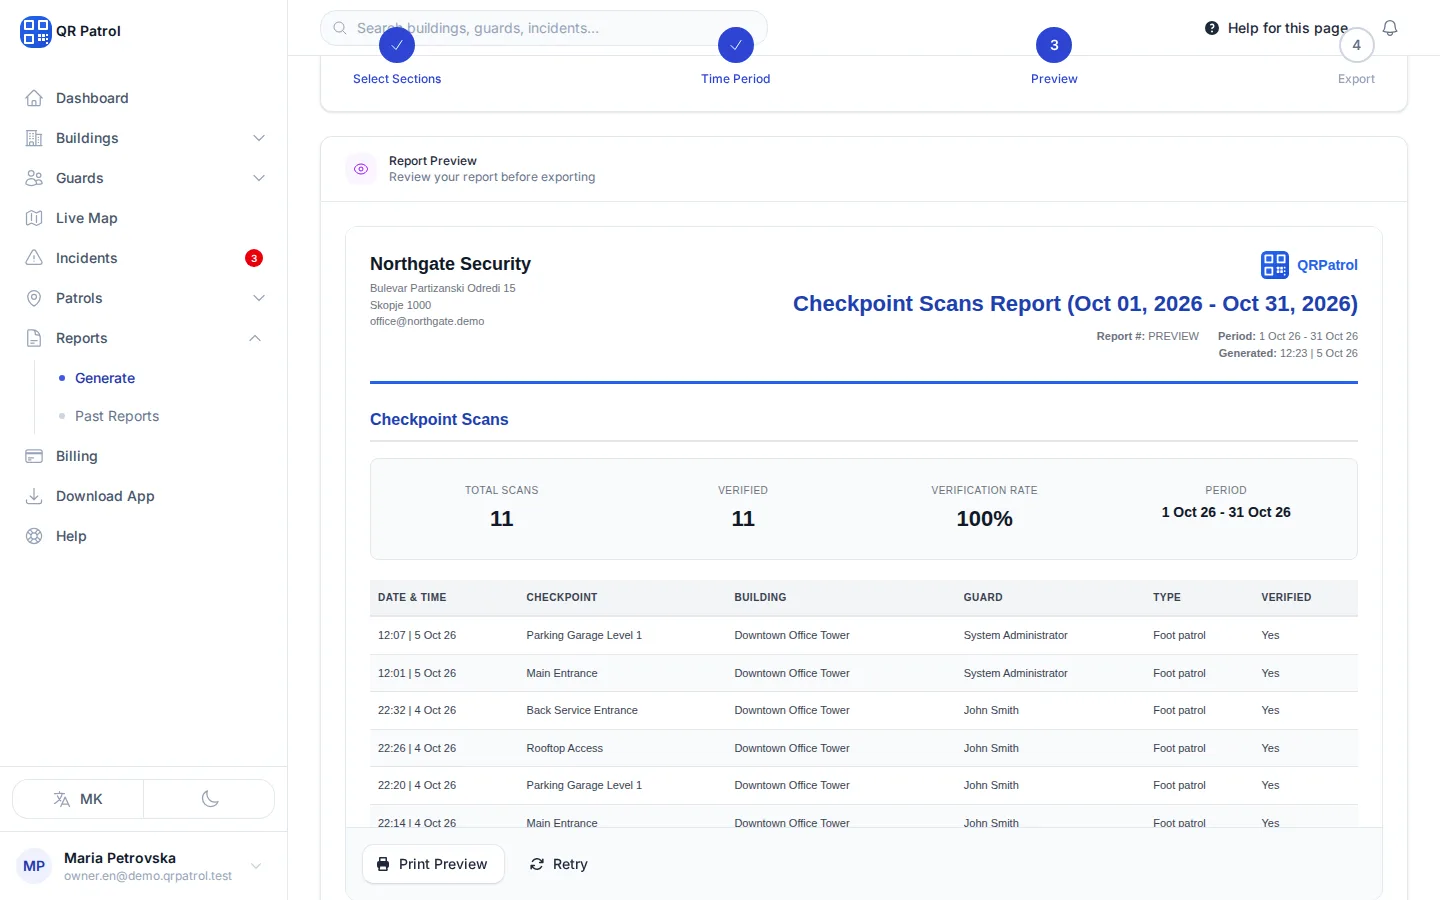
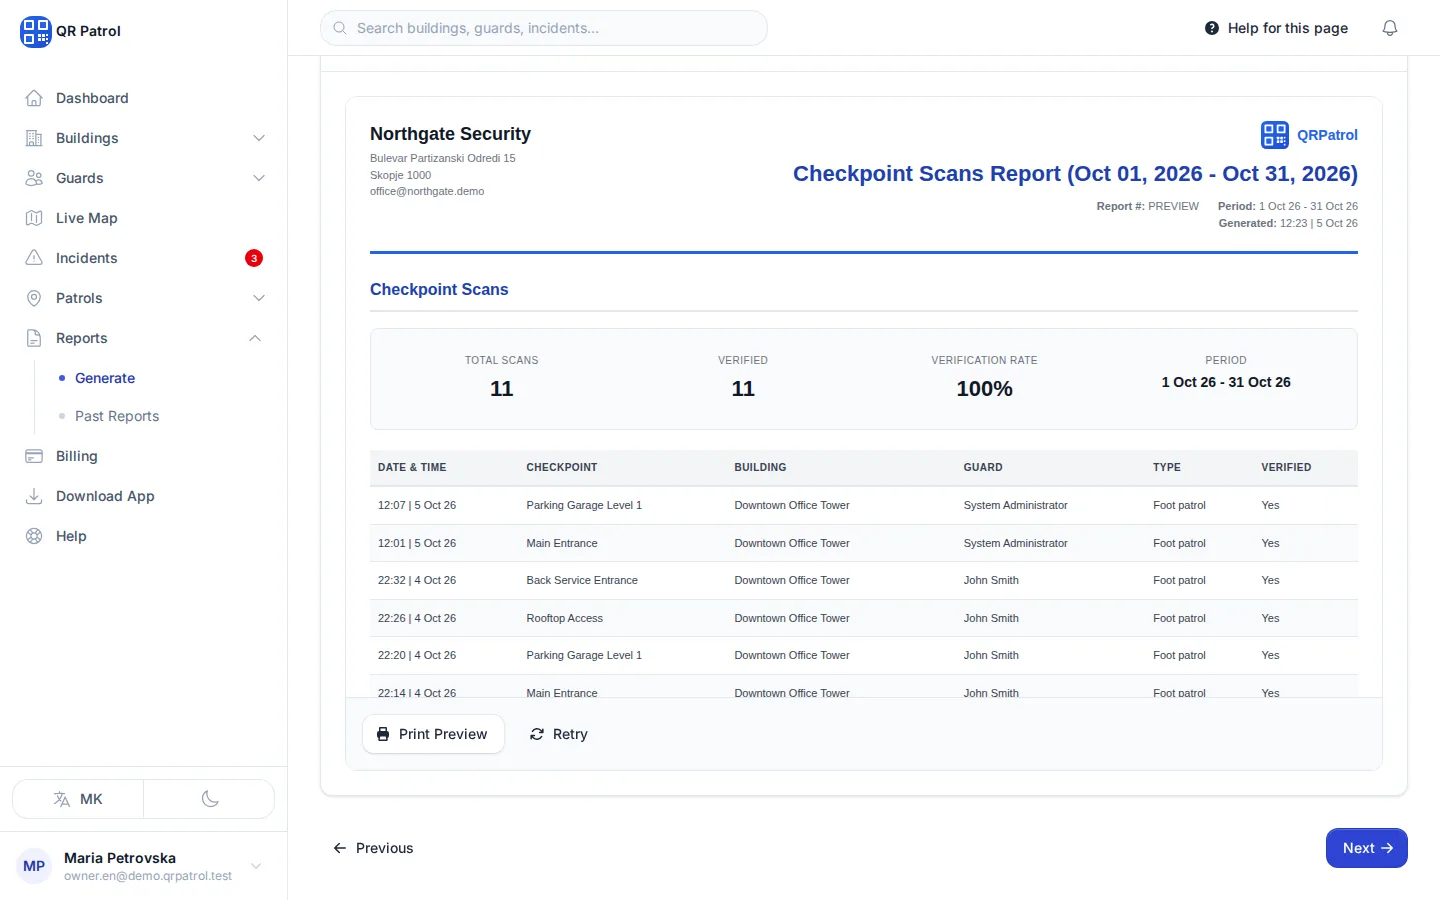
Check the Report Preview with the data for your period before you export it.
-
Click Next.
-
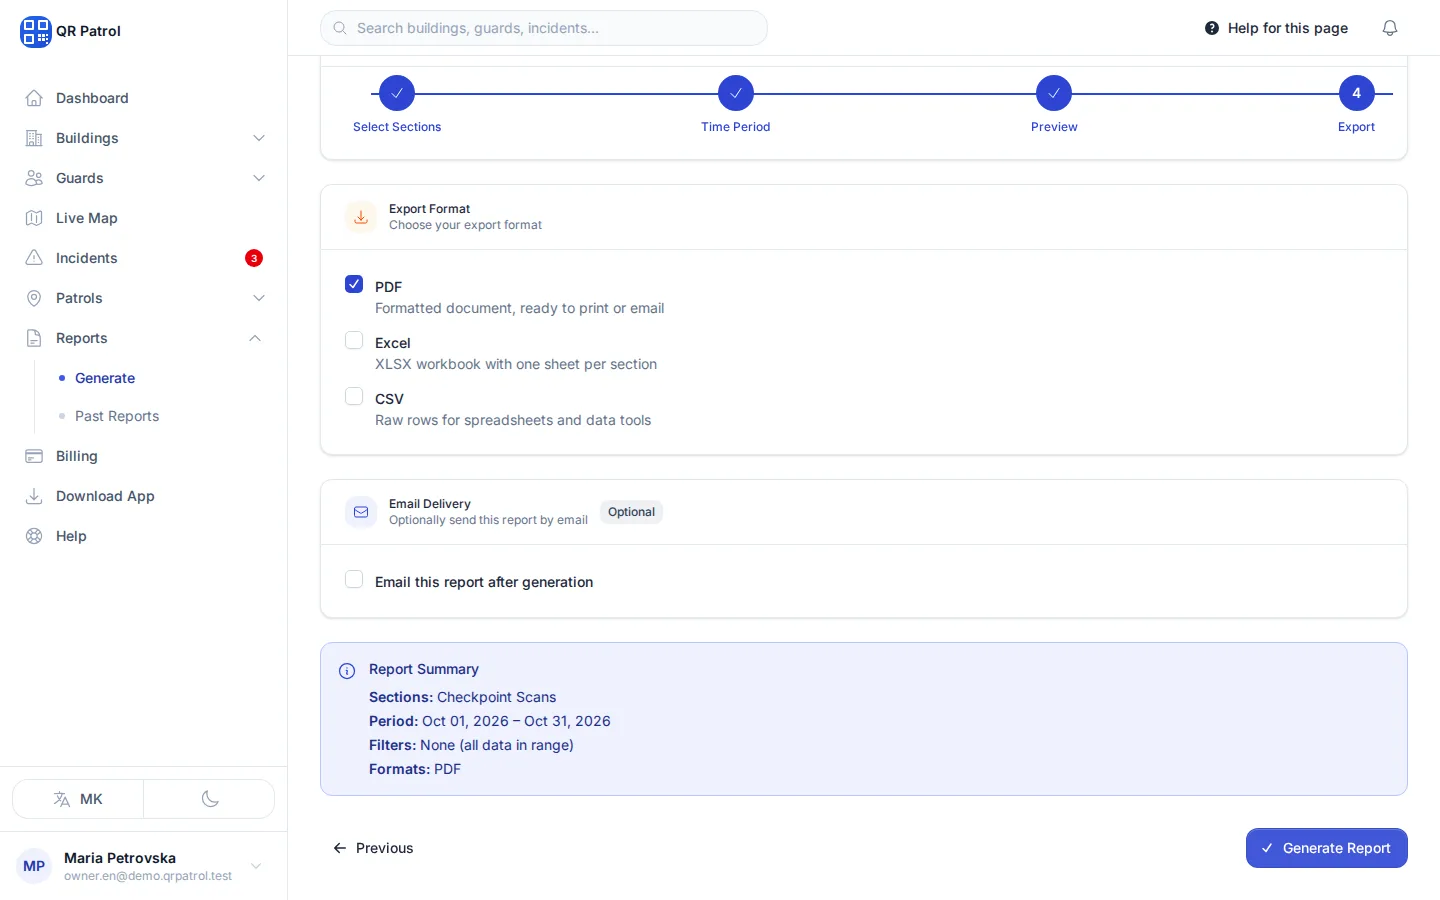
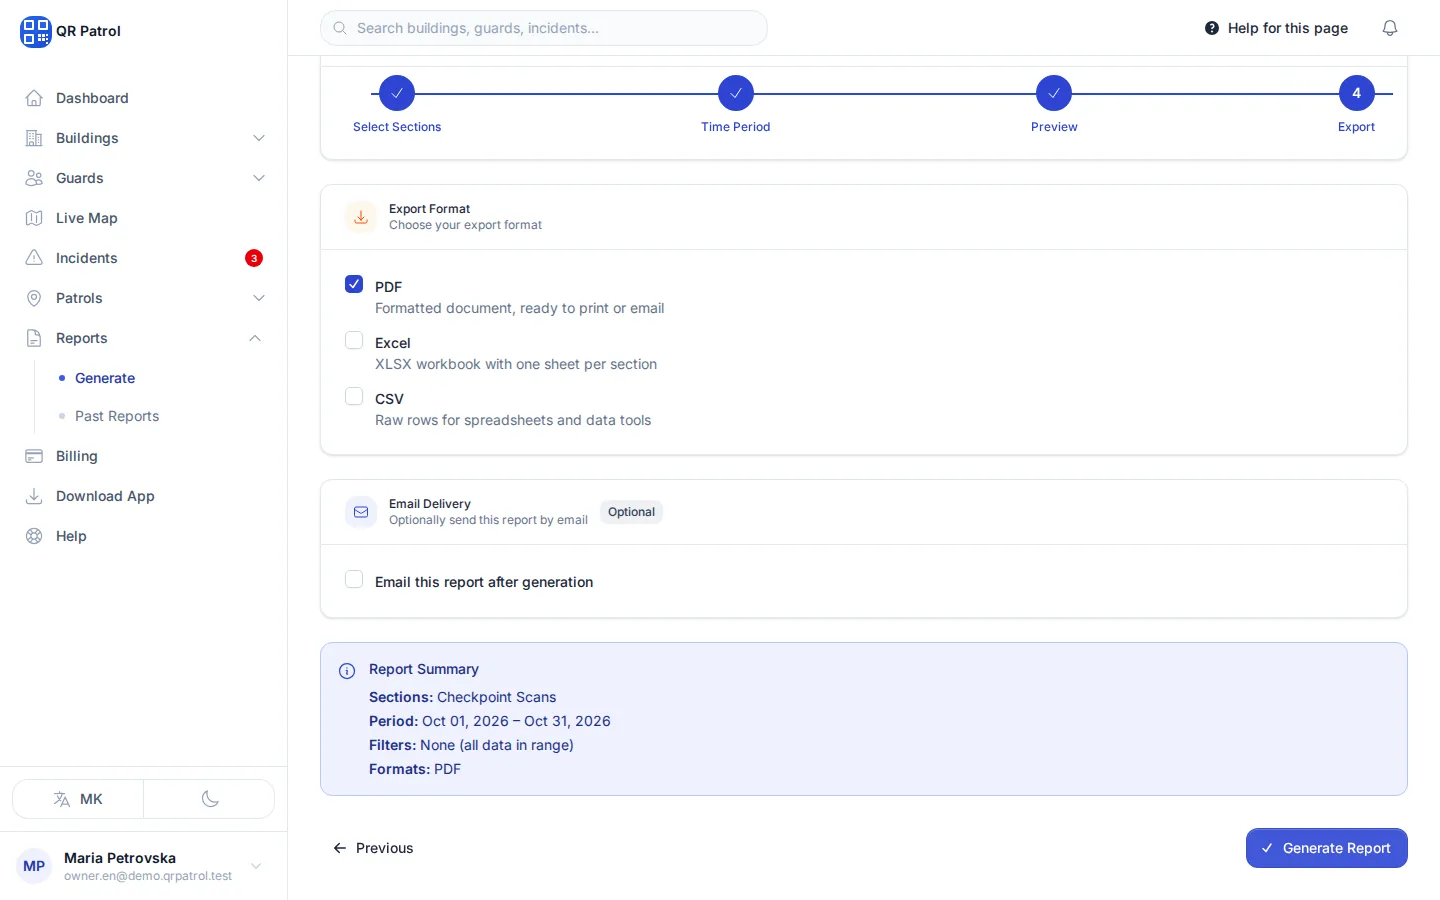
PDF is ticked already. To send the report straight to a client, tick Email this report after generation and enter their address.
-
Click Generate Report. The finished report appears in Past Reports.
Generate a report
- In the sidebar, open Reports and click Generate.
- Under Report Sections, tick what to include: Checkpoint Scans, Patrol Sessions, Incidents or Guard Performance. You need at least one.
- To narrow the data, tick Buildings, Guards or Patrol Routes under Filters. Leave them empty to include everything.
- Click Next.
- Choose Select Months, Select Weeks or Custom Date Range, then tick the months or weeks, or set a Start Date and End Date. The list goes back to your oldest data.
- Click Next. QRPatrol builds the Report Preview. Use Print Preview if you want a paper copy straight away.
- Click Next.
- Under Export Format, tick PDF, Excel or CSV. You can pick more than one.
- Click Generate Report.
QRPatrol saves the report and opens Past Reports, with the new report at the top.
Going back
Click Previous, or a ticked step at the top, to change an earlier choice. Changing sections, filters or the period throws away the preview, so it is built again with the new data. Start Over clears the whole wizard. If you leave the page halfway, the wizard remembers where you were.
Email a report to a client
Clients do not log in to QRPatrol, so email is how they get their report. The email has the PDF attached, so the report needs to include the PDF format.
To send it as you generate it:
- On the last step, under Email Delivery, tick Email this report after generation.
- Change Recipient Email to the client's address. It starts with your own.
- Click Generate Report.
To send a report you generated earlier:
- Open Past Reports.
- Click the envelope button on the report's row.
- In Recipients, enter one or more addresses, separated by commas or semicolons.
- Check the Subject.
- Click Send Email.
Download or delete a past report
On Past Reports, search by report number or title, or click Filters to show one Section or Period.
- To download, click the download button on the report's row and choose PDF, Excel or CSV. Only the formats you generated are listed.
- To delete, click the red bin button and confirm with Delete Report. This cannot be undone.
Quick reports on screen
For a fast look without saving a file, open Reports.
- Choose a Report Type, for example Patrol Sessions or Building Activity.
- Set the Start Date and End Date. The last 30 days are filled in for you.
- To narrow it down, choose a Building (Optional) or Guard (Optional).
- Click Generate Report.
The summary and the rows appear below. Click Export CSV to download them.
Related articles
- Read your analytics See trends in checkpoint scans, patrols, compliance and incidents over the last 7 to 90 days, for all buildings or just one.
- Handle incidents Review incidents your guards report, assign them, move them from open to resolved and log new ones yourself.
- Follow and review patrols See which guards are patrolling right now, then check a finished patrol's scans, missed waypoints, compliance and route deviations.